


The + button offers two options: an ordinary tournament or a regular event with seasons — a one-off cup only needs an ordinary tournament. Any tournament can be turned into a main event when you need one — a cover with no bracket of its own that groups several tournaments inside it. Teams can be added by hand, through applications, or via an invite link sent to coaches; the methods combine.
Which option should you create?
The + button in the tournaments list offers two options. The confusion is usually not about the menu itself but about the main event — it has no entry of its own here: it is a setting on an ordinary tournament, not a third way to create one.

- Tournament — an ordinary competition: a table or a bracket, a start and an end, a winner. One cup, one league, one tournament weekend. The default option — if in doubt, this is the one you want.
- Regular event — a cover for a competition that repeats season after season: for example an "Academy Championship", where tournaments by age are played out again every year.
Main event is not an entry in that menu — it is a property of an ordinary tournament: the tournament stays a tournament, but becomes a cover with no bracket or table of its own, holding other tournaments inside it. There are two different routes into one:
-
Directly. Create an ordinary Tournament and switch on This is main event in its settings. Good for a one-off grouping: one festival containing U10, U12 and U14 tournaments; a city championship containing divisions, each with its own table.
-
Through a regular event. Create a Regular event, then pick or start a season — the app creates the main event for that specific season.
The page of a main event created from a regular event carries a season switcher — you can open a past or future season and work with its tournaments, results and rosters without starting the event over. Ordinary tournaments inside it do not have that switcher: it only lives on the main event's own page.
You need neither a main event nor a regular event. Create an ordinary Tournament and move on to the next step — simpler for you and for the participants.
Fill in the tournament card
Once you have picked an option, the Tournament Settings screen opens. Only one field is required — Tournament Name. Everything else can be filled in now or later: the card stays editable through the ⋮ menu → Edit.
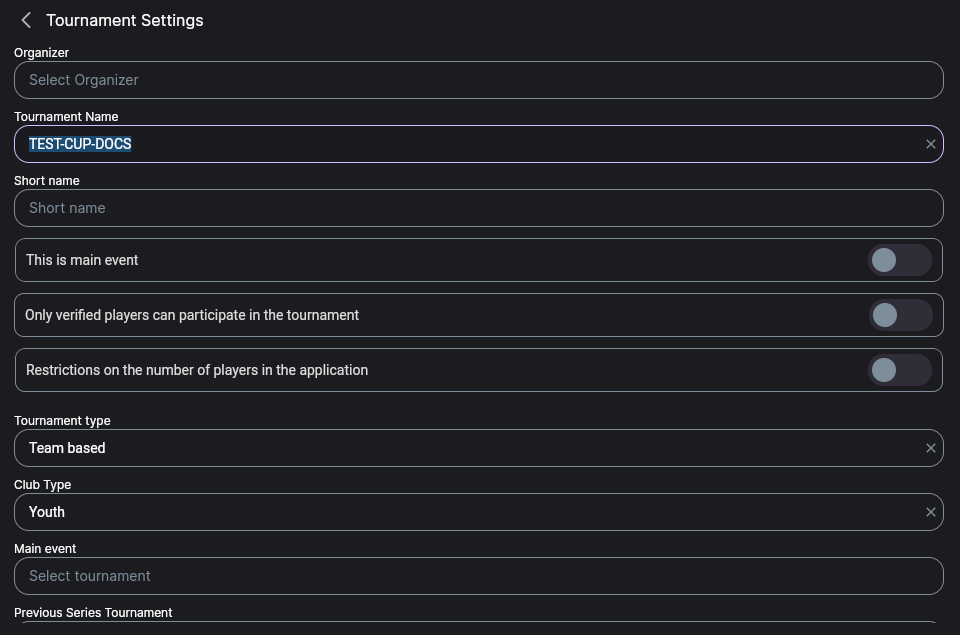
Worth a look while you are here:
- Tournament type — Team based or individual. For a normal football tournament leave it team based.
- Club Type — youth, amateur and so on. It decides which teams you will be able to add.
- Tournament Start Date and Tournament End Date — at the bottom of the screen. A tournament without dates still saves, but it will not appear under Current or Upcoming in the tournaments list, which makes it harder to find later.
City and time zone
A tournament's time zone is the competition's official time. It is what gets printed on posters, announcements and other materials the app prepares for publication.
When you enter or edit the schedule, you can choose which time you type the match time in — the app labels it exactly that way: Enter match time in time zone, offering Tournament time zone or Device time zone. This matters when the tournament is in another city or country: say you are building the schedule from Moscow for a tournament in another region, or abroad. Posters and other materials always show the time in the tournament's own time zone, whichever one you typed it in.
Age criteria
This is the one place where a new tournament usually trips up.
Scroll the settings down to the Restrict Age Criteria switch. On a new tournament it is already on, while the Players Birth Year field underneath is empty — it holds 0.
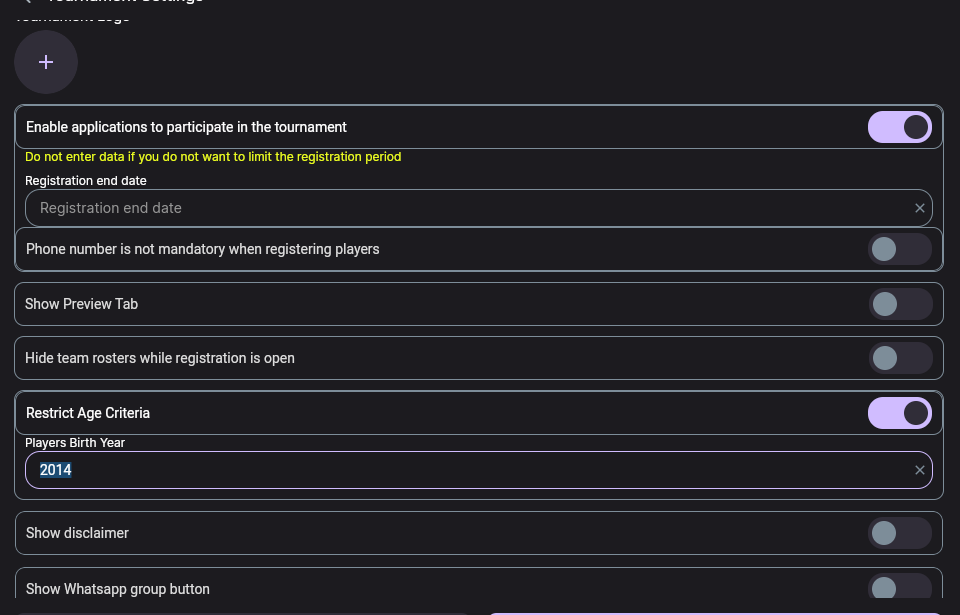
Do one of two things:
- type a year into Players Birth Year — for example 2014 for a U12 tournament;
- or switch the restriction off if the tournament has no age limit.
Tap Save without touching this block and exactly that message appears at the bottom of the screen, and the tournament is not saved. The wording is misleading: it is not about an age, it is about the birth year that is still zero. Go back to Restrict Age Criteria and either enter a year or turn the restriction off.
After that Save works and the app opens the card of the tournament you have just created.
Add the teams
A tournament participant is a club's team of a particular birth year; one club can enter several teams of different ages. Adding teams by hand is best when the line-up is already settled — you rang the clubs in advance, say. If the line-up is not settled yet, skip ahead to the next section — both of those methods combine with adding teams by hand.
-
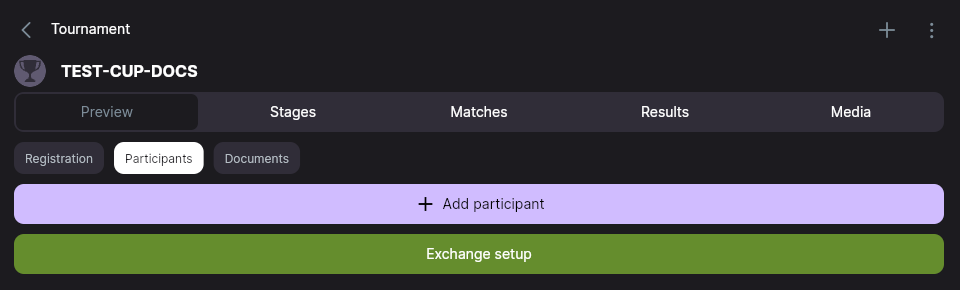
On the Participants tab tap Add participant and pick the club.
-
Pick the team's year. By default the app fills in the year set in the tournament's settings.
-
If the club already has a team of that year, it is added to the tournament. If it does not, the app creates one automatically, named and badged after the club.
-
If you are entering an older age group's team, pick that team's real birth year — 2013 instead of 2014, say.
-
To add a second squad from the same club, open the participant card of the team you already added and tap Add Second Team — the app creates a copy named something like "Club-2".
If the club you need is not in the directory, tap + in the club list and choose Create the team yourself. Despite the name, what opens is a club form — name, badge. Once the club is saved, the app creates a team for it automatically and adds that team to the tournament, so you never type the team's name or badge separately.
If the line-up isn't set yet
For open tournaments, when you do not know in advance who will want to play, there are two ways in — applications from coaches, and invitations. Both combine with each other and with adding teams by hand from the previous section.
Applications from coaches
In the tournament settings turn on Enable applications to participate in the tournament — the same block as in the age-criteria screenshot above. Set a Registration end date if you need a deadline, and turn on Hide team rosters while registration is open next to it if rivals should not see the entered players while the sign-up runs.
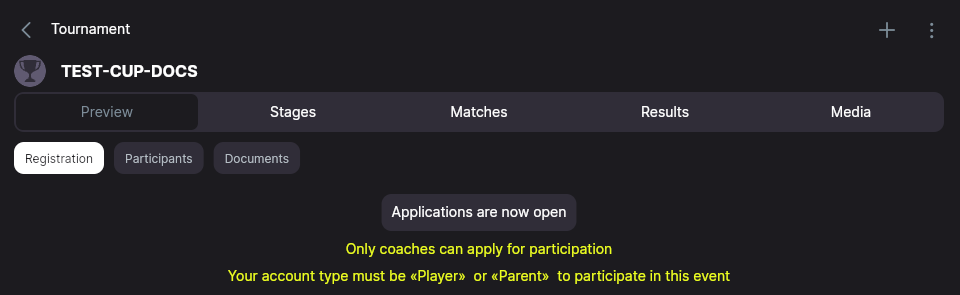
Once saved, a new Registration tab with a status appears on the tournament card.
Invite a coach with a link
The quickest route when the teams are not in the app yet: the coach sets up their own team, and you do not spend time typing in rosters.
In the ⋮ menu of the tournament card choose Invite coach. The app shows a link and a copy button — send it over a messenger or by email.

Using that link a coach creates their team and joins the tournament. From there you have two options:
- a personal invitation — you create the players in the team in advance and invite a specific person; once they accept, they are linked to the chosen player automatically;
- a general invitation — you add a list of players and the invited users pick which player they are responsible for themselves.
Troubleshooting
The tournament will not save
Check Tournament Name and the Restrict Age Criteria block — it is nearly always the empty birth year, see age criteria.
I cannot find the tournament I just created
The tournaments list is split into Current, Upcoming and Archive, and all three go by dates. A tournament without dates lands in none of them. Open its card and fill in Tournament Start Date and Tournament End Date.
The club I need is missing when adding a participant
Check Club Type in the tournament settings — it limits the list of available teams. If the club does not exist at all, create it through + in the club list, see adding teams.
A coach cannot submit an application
Applications are submitted by coaches from their own accounts — an organizer cannot apply on their own behalf. Make sure applications are enabled and that the Registration end date has not passed.
Next steps
Next come schedules, groups and playoffs — that is its own article, "Groups + Cup and Plate playoffs".
If players need to confirm themselves — self-registration through an access link, phone numbers, organizer review — that is a separate process, covered in «Player verification and self-registration».
Still stuck? Write to support@nsgsoft.me and we will help you sort it out.